
Along with Snickerdoodles, Old-Fashioned Lemon Bars are a wonderful childhood memory. Just reading that sentence gives me all the feels. However, over the years, it's been hard to find a recipe that replicates the memory! And for Snickerdoodles, too, actually. I finally decided to do some research and testing and come up with my own recipe to attach to the memory and to see if I could make it gluten-free. Let's just say that I met with success. Read on!

Recipes for Lemon Bars go back many years. By all accounts, the concept dates back to the 50s or 60s with Betty Crocker having a hand in its beginnings. At the time, it seemed a novel idea to make a "finger dessert" that wasn't a cookie. To be able to do it in one bake was an advantage rather than having to man several cookie sheets through the oven over the course of a couple of hours!
The base of an Old-Fashioned Lemon Bar
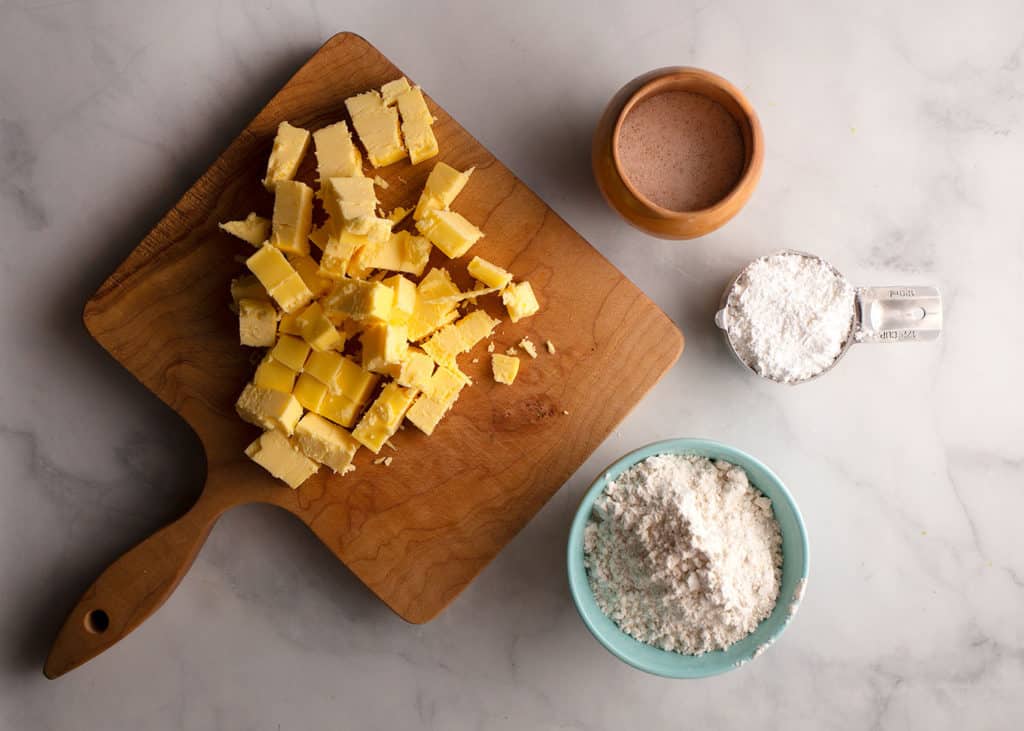
The base is a basic shortbread. Some recipes call for granulated sugar, but I like using powdered sugar as it seems to make it softer and easier to press into the baking dish.
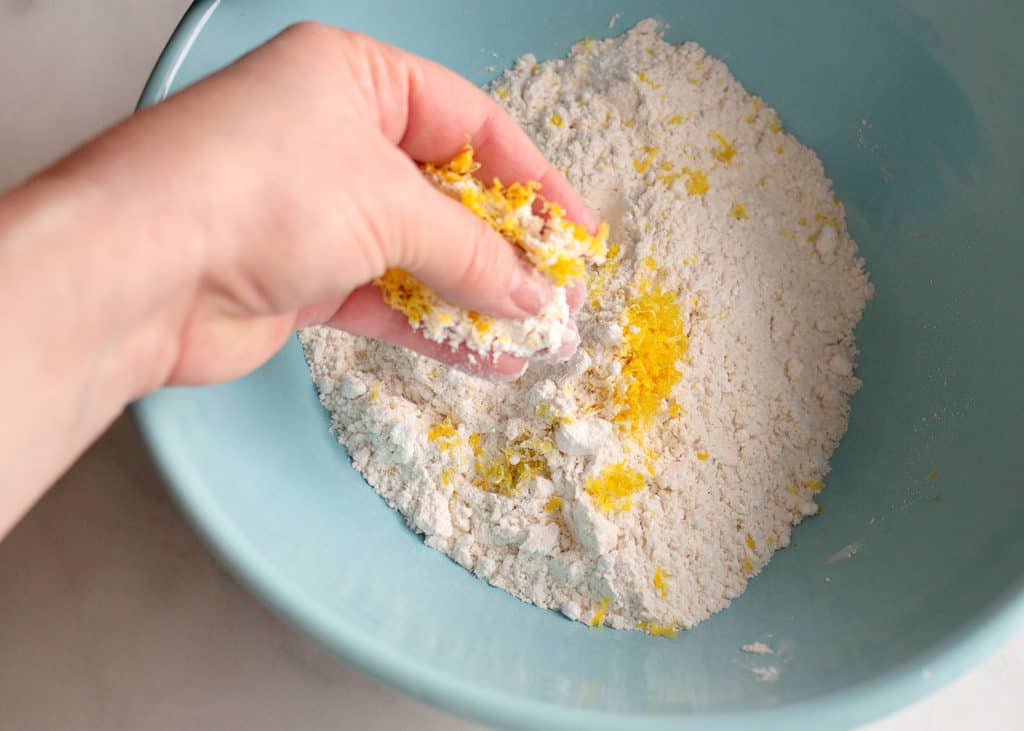
The secret to adding more lemon flavor to Old-Fashioned Lemon Bars is putting lemon zest in the crust as well as in the custard. When you press the lemon zest between your fingers in the flour mixture, the essence of lemon is released and the flavor is amazing!
Be sure your butter is room temperature, then mix this dough in a food processor or in a mixer with a paddle attachment. You can do it by hand, but it will take longer. That's not a deal breaker, for sure, but the machine is a great help.
What size baking dish should I use?
Press the dough into a parchment-paper-lined baking dish. The standard size baking dish would be a 9x13-inch, but I have an 8x11-inch that I love baking these Old-Fashioned Lemon Bars in. It's just smaller enough to make the final product a bit taller and more luscious ... just like I like them!
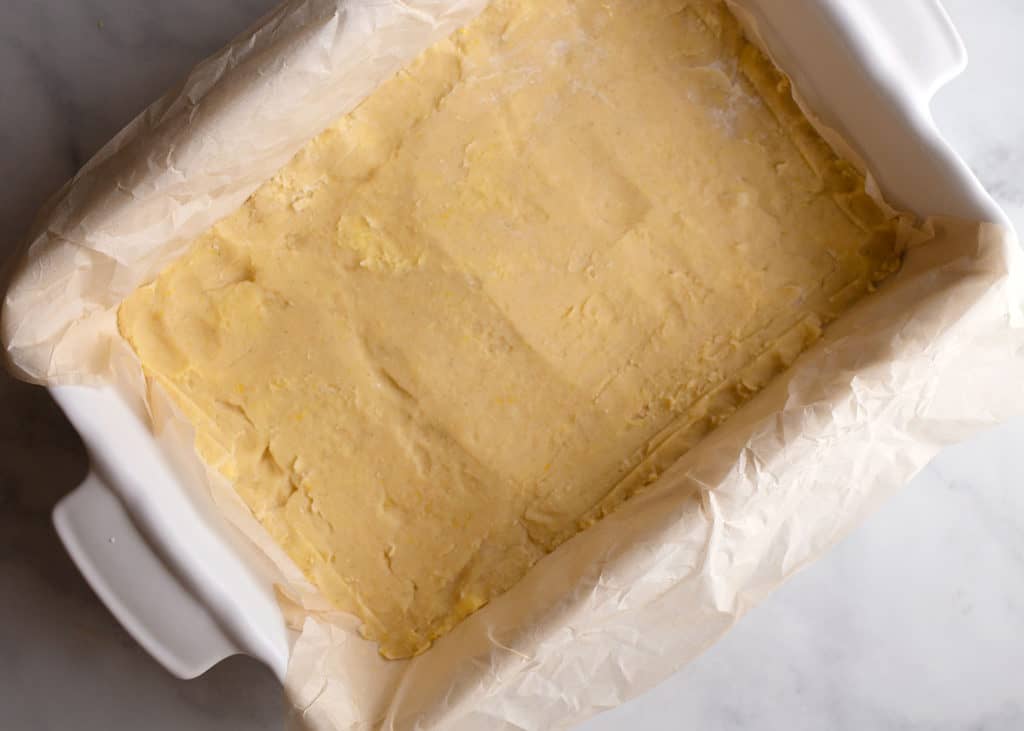
Why should I use parchment paper to line the baking dish?
The parchment paper lining makes it so much easier to lift the bars out of the pan before cutting them to serve. You can simply lift them out with the paper, then cut them into squares.
Bake at 350F for about 20 minutes until it is golden.
On to the lemon custard
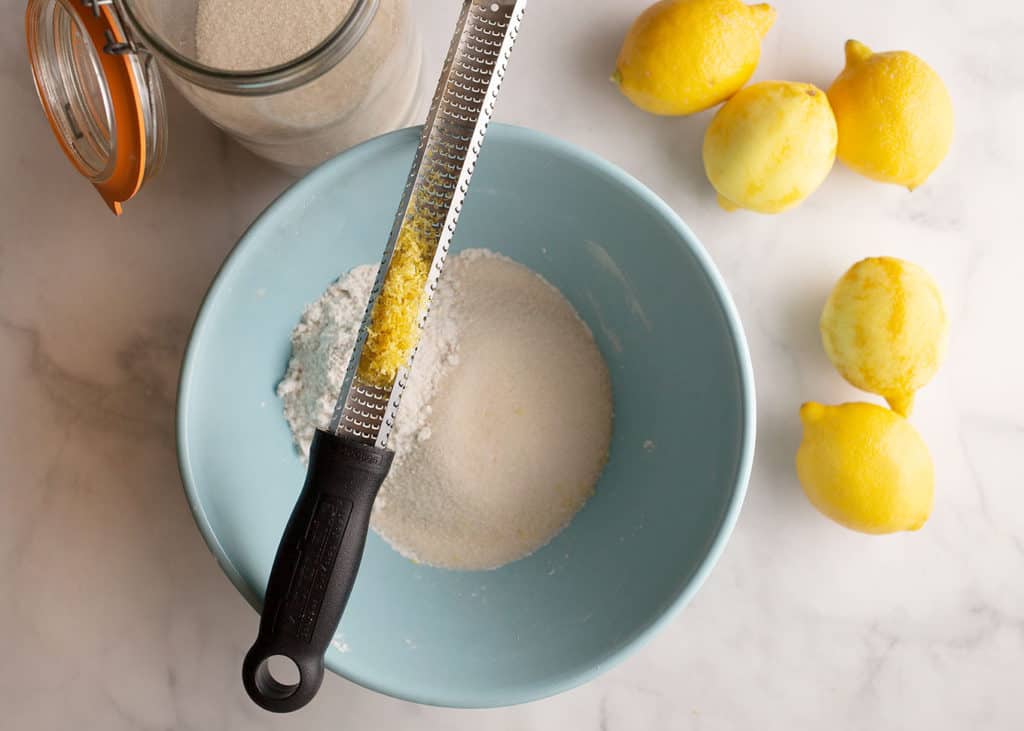
While the crust is baking, prepare the custard by first mixing the sugar and flour with the zest of all the lemons you'll use for the juice ... 4-5. Do that "pressing of the zest with the dry ingredients" thing again.
How many lemons does it take?
It's hard to know exactly how much juice you'll get from a lemon! On average, you'll get about a quarter cup of juice from each lemon. Given that this recipe calls for a cup of lemon juice, you'll need at least 4.
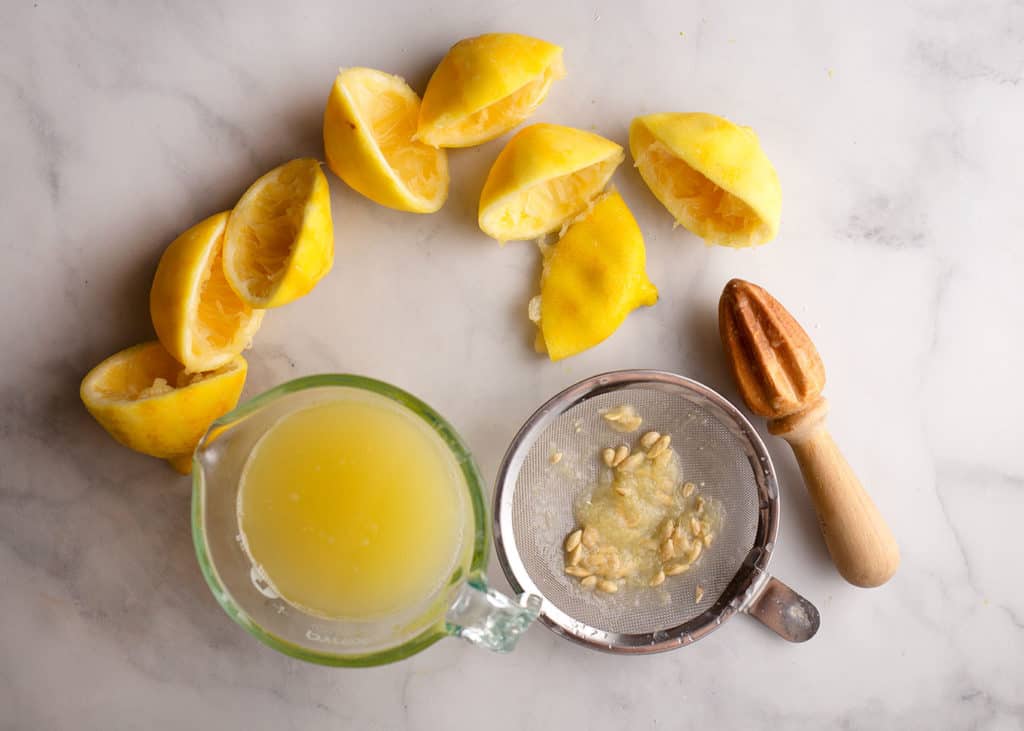
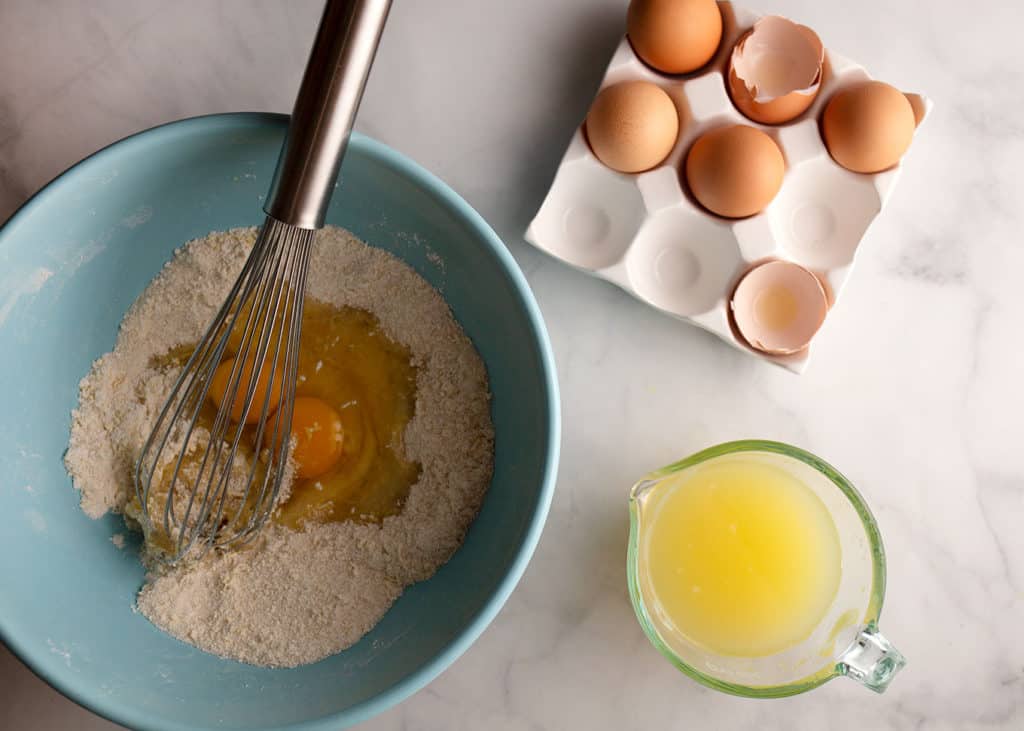
Mix the eggs with the flour, sugar, lemon zest, and lemon juice. I find that whisk does a good job.
Pour the lemon custard over the baked crust and carefully transfer it to the oven.
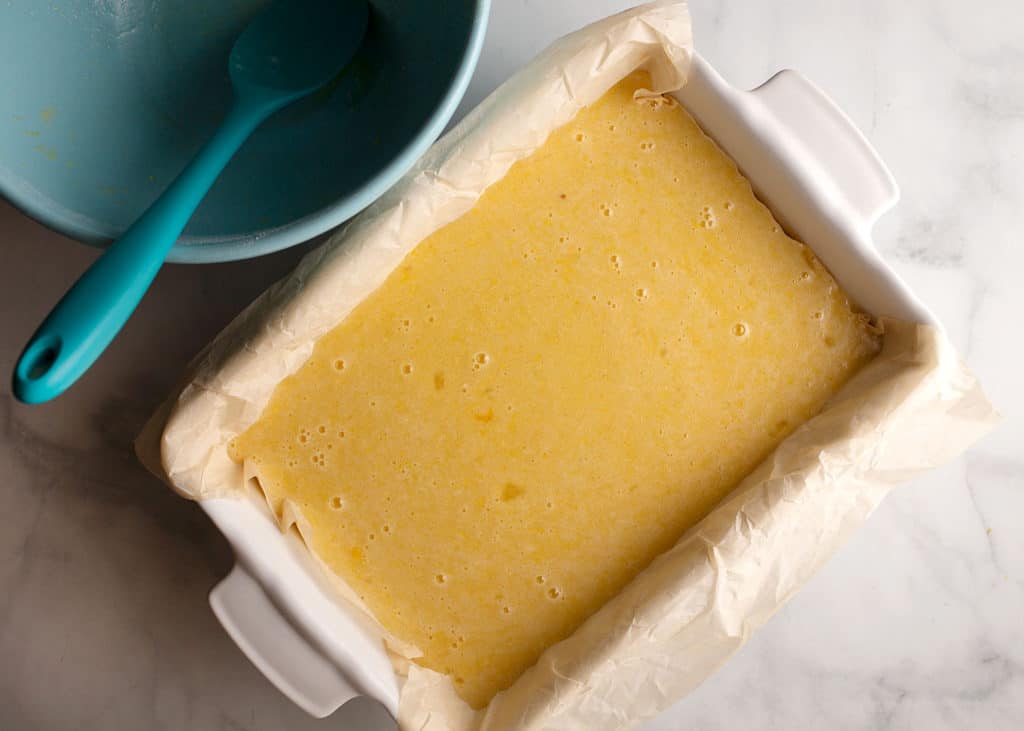
The time it takes to bake will be determined by the size of your pan and the thickness of the custard. As I mentioned earlier, I like to use the smaller 8x11 size baking dish so that the custard is thick so I usually have to bake mine 30-40 minutes rather than the 20-30 that a 9x13 will require. It's ready when there is just a slight jiggle when you move the baking dish.
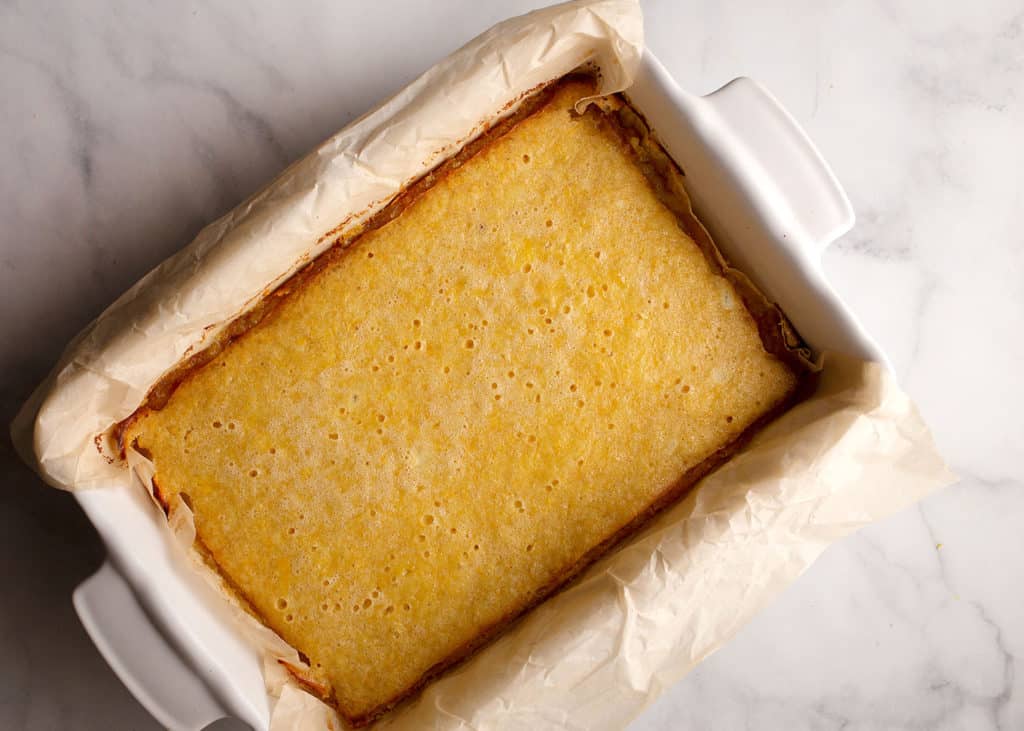
Allow it to cool completely in the baking dish, then transfer it to the refrigerator to chill for at least two hours before serving.
How to serve Old-Fashioned Lemon Bars
While it's not necessary to trim the edges, I usually do. It makes every serving feel like it came from the center of the baking dish ... which is my favorite! Lemon Bars are quite rich so I cut them in small squares, but of course, you can cut them any size you like.
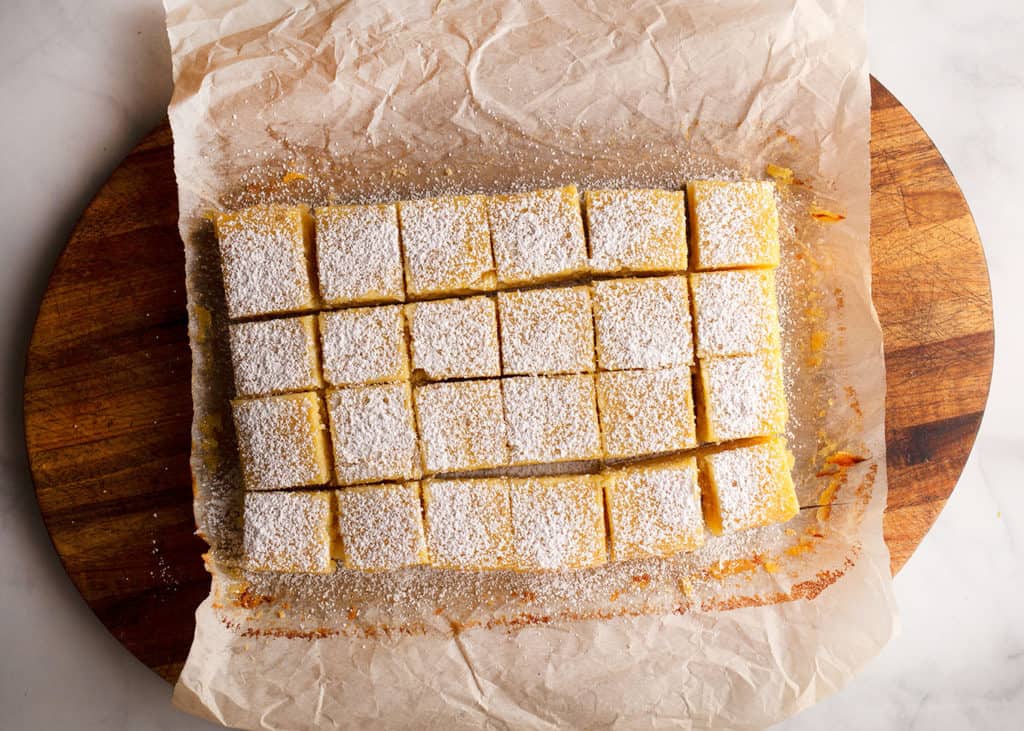
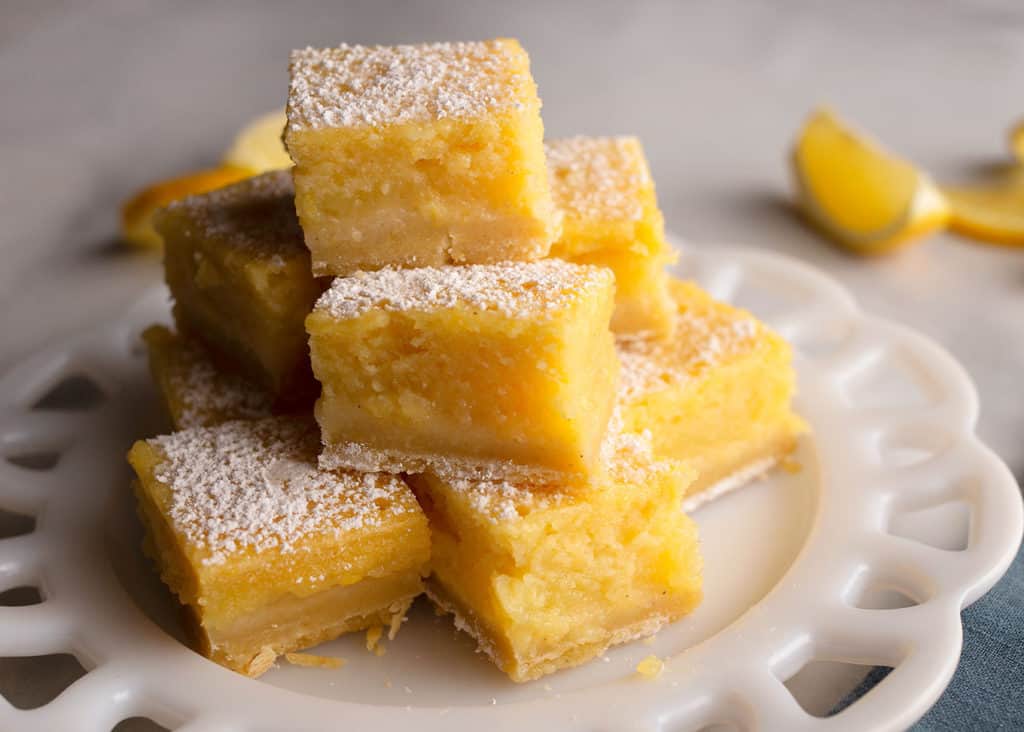
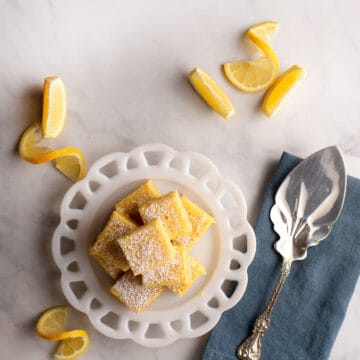
Sprinkled with powdered sugar, these Old-Fashioned Lemon Bars are beautiful for an afternoon snack, a party, a picnic ... any time you want a lemony pick-me-up!
Recipe
Old-Fashioned Lemon Bars
Ingredients
FOR THE CRUST
- 1 cup butter (2 American sticks) (227 grams) chilled
- 1½ cup flour Gluten-free 1:1 works!
- ½ cup powdered sugar
- ½ teaspoon sea salt
- zest of 1 lemon
FOR THE LEMON CUSTARD
- 1½ cups granulated sugar
- ½ cup flour Gluten-free 1:1 works!
- 6 large eggs
- 1 cup lemon juice freshly squeezed
- zest from all the lemons juiced 4-5
- powdered sugar for dusting
Instructions
FOR THE CRUST
- Preheat the oven to 350°F. Prepare an 8x11 (or 9x13) pan by lining it with parchment paper. It helps to butter the pan a little first so that the parchment paper sticks.
- Mix the flour, sugar, and salt in a large bowl with a whisk. Add the lemon zest and press it through the mixture with your fingers.
- Using a grater, grate the chilled butter into the flour, sugar, salt, and zest mixture stopping occasionally to toss it with the flour mixture.
- Press into the prepared pan and bake until golden, about 20 minutes.
FOR THE LEMON CUSTARD
- Place the flour and sugar in a bowl and add the lemon zest. Use your fingers to press it through the mixture.
- Add the eggs and lemon juice and whisk till it is incorporated. Pour the custard over the crust and return it to the oven till it is just set. 20-30 minutes. If you use the smaller 8x11 pan, you'll probably have to go longer than 30 minutes. Test it by slightly jiggling the pan. It should have a little jiggle, but not much.
- Allow to cool at room temperature before placing the pan in the fridge. Refrigerate for at least 2 hours before serving. Store in the refrigerator.
Pat
Cannot be left out when serving for over 30-45 min as they will soften quite a bit. Serve cool. I also made these with gluten free flour. Delicious!
Tammy Circeo
Yes, they do soften a bit, but serving straight from the fridge works real well. I'm so glad you enjoyed them!